 Jake Rubin
 Leo Kamino Barros
 Şan Halaçoğlu
 Ilam Imayavaramban
March 10, 2022 – March 31, 2022


This was the second project assigned in CPEN 291: Computer Engineering Design Studio I. Unlike the dancing robot project we named Batbot, our group was allowed more free reign to decide a project to build. The project had to utilize a web-app hosted by an Apache web server running on a virtual machine. Our group decided we wanted to make a project that was relevant to current events. This project merges a React-based front-end, a Node.js-based back-end, and Arduino Uno-centered hardware system, and "grants access" to an individual if they pass a symptom questionnaire, body temperature check, and vaccination identification check.
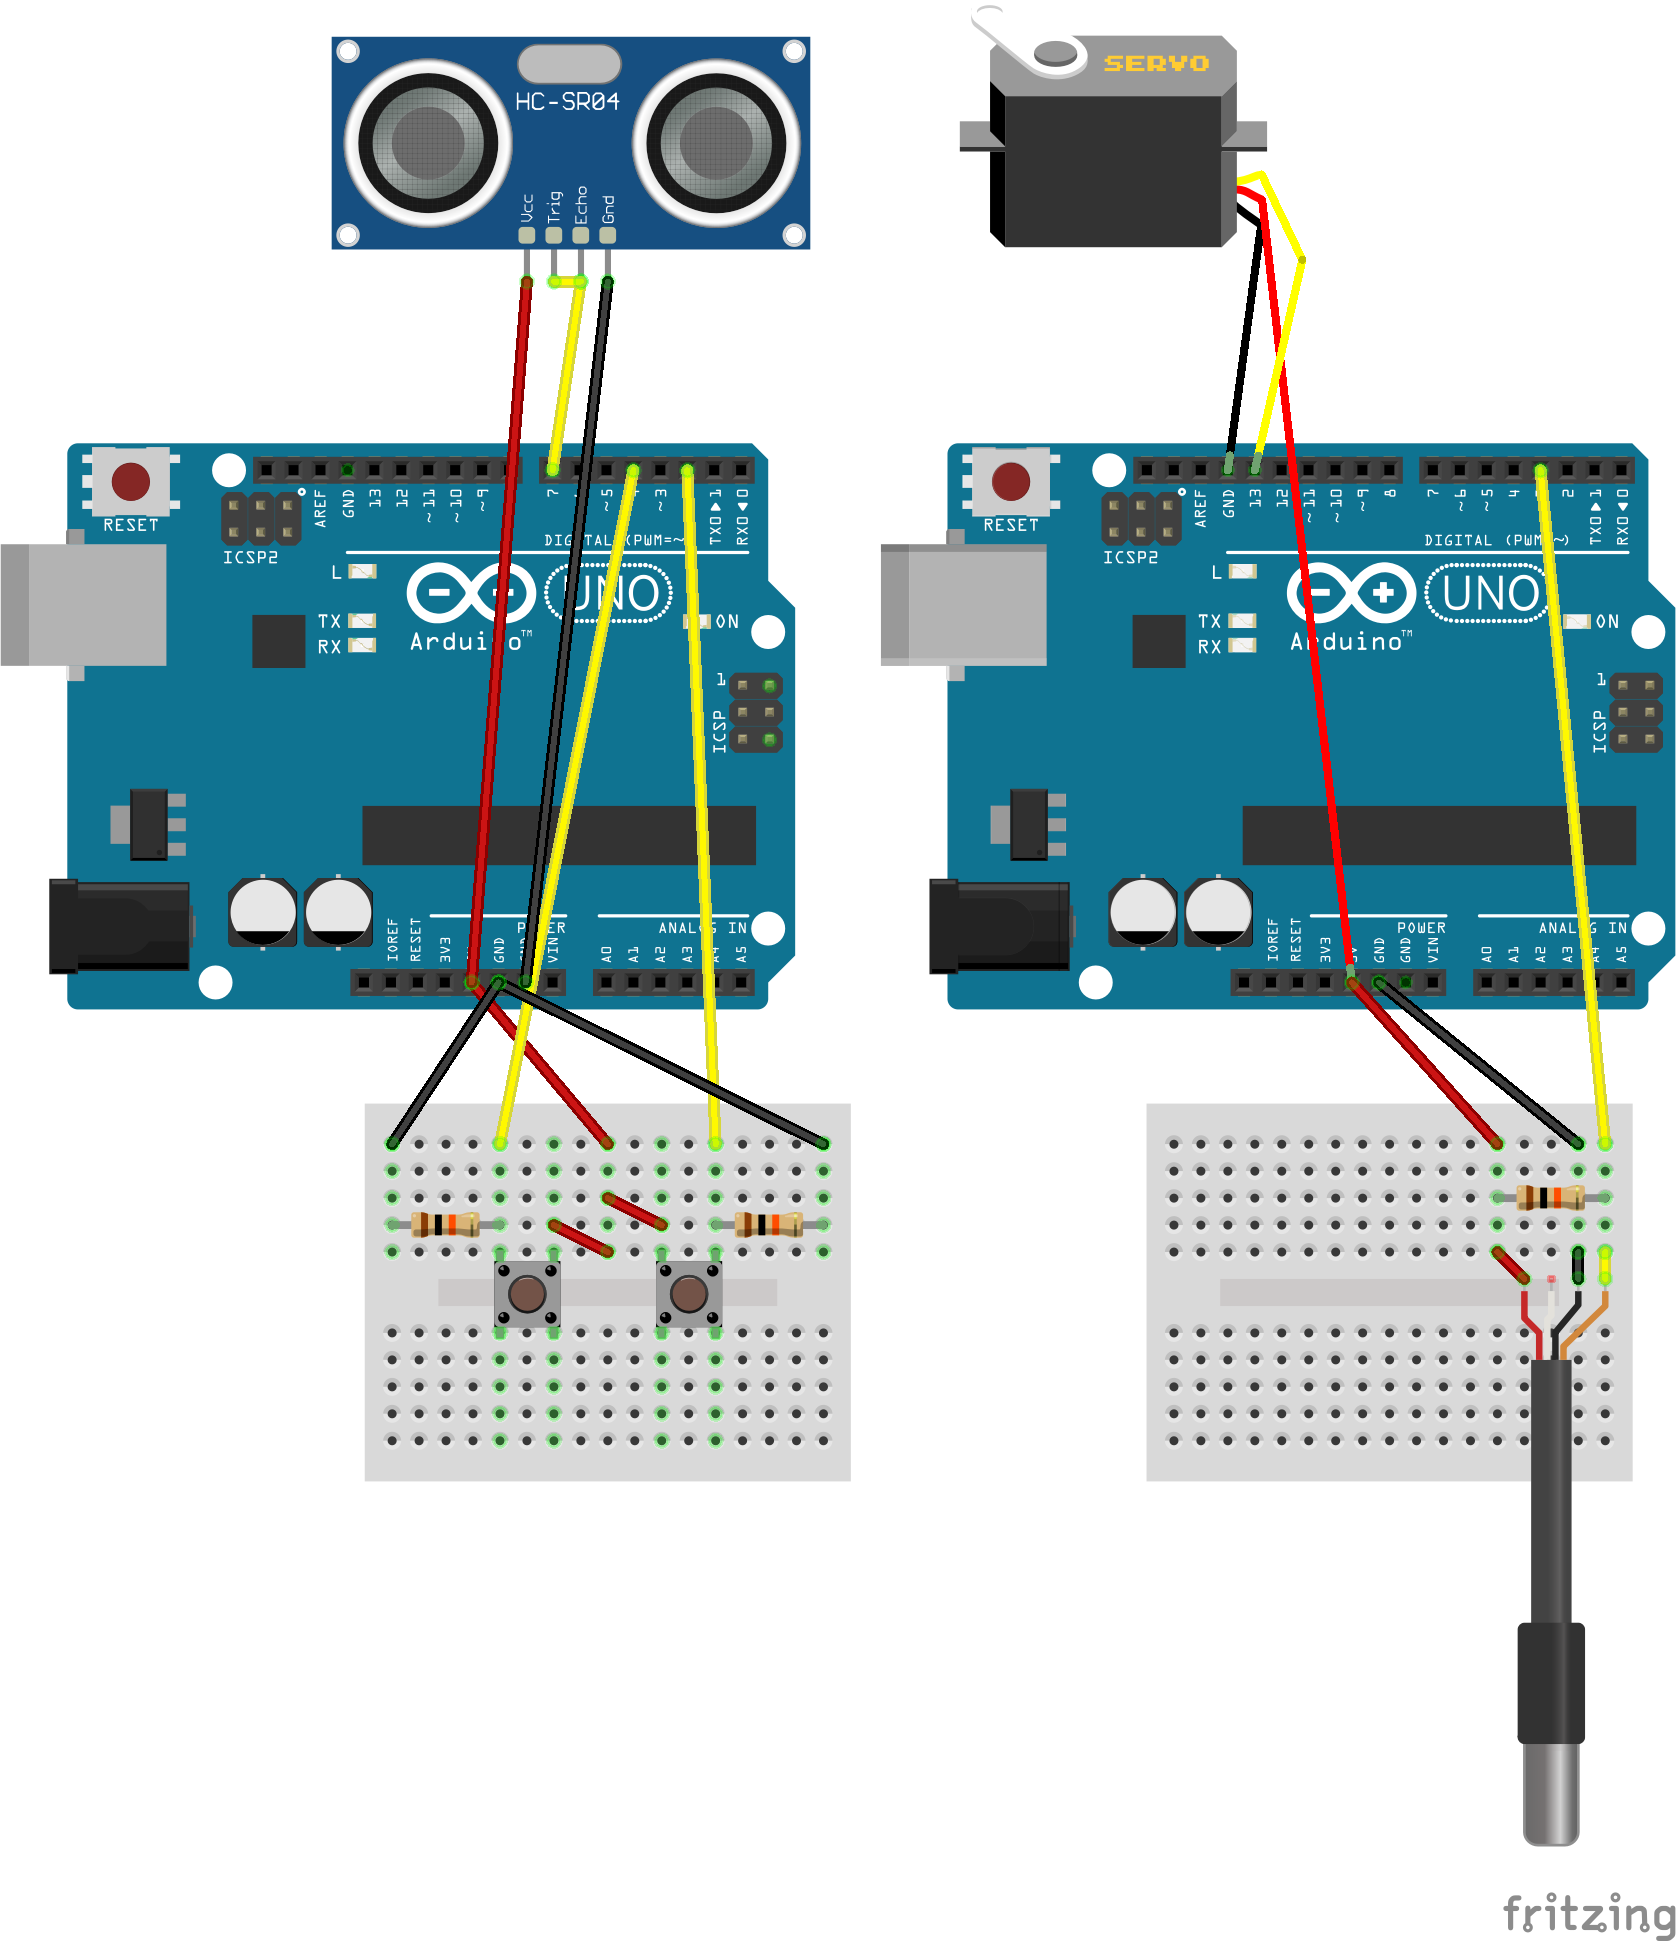
| Quantity | Item Name | Item Type |
|---|---|---|
| 2 | Arduino Microcontroller | UNO |
| 1 | Body Temperature Thermometer | DB18S20 |
| 1 | Ultrasonic Distance Sensor | HC-SR04 |
| 1 | Mini-Servo Motor | |
| 2 | Push Button | |
| 3 | 10,000 ± 500Ω Resistor | |
| 2 | USB-A to USB-B Connector Cable | |
| 2 | Solderable Perfboard | |
| Click to view this project's Fritzing. | ||
COVID App Fritzing

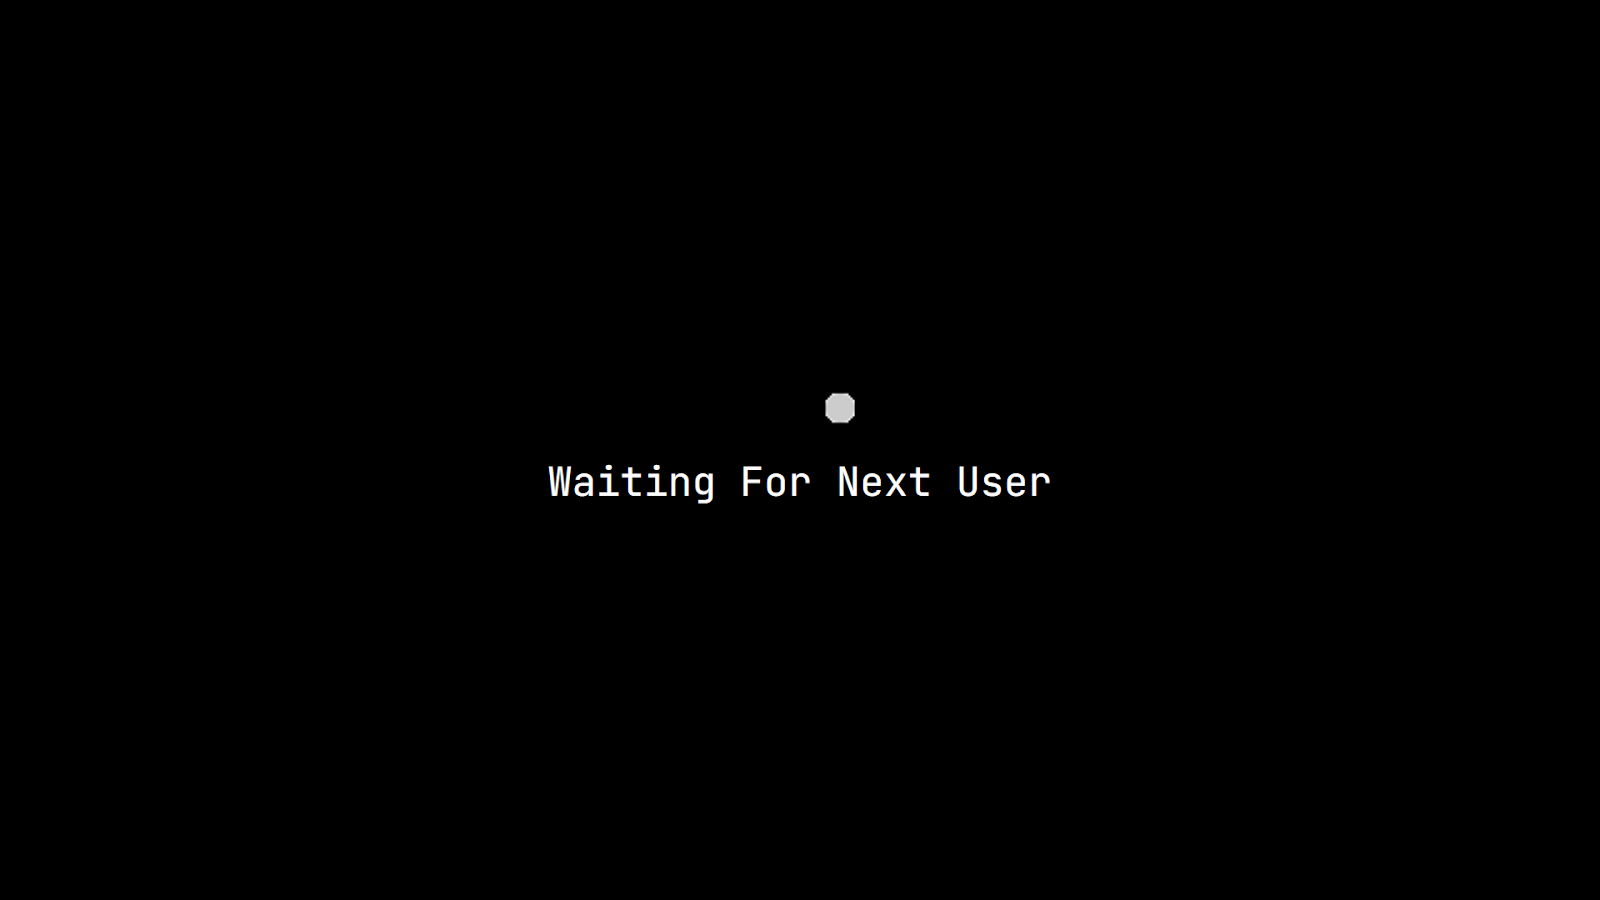

Upon opening the application, the user is greeted with a waiting screen.
In effect, the application waits for a user to come within range of the computer and hardware to begin the screening process.
The HC-SR04 sonar, via the Johnny-Five hardware libraries, is assigned an event listener.
On a change of reading, the back-end checks if a person is within 50 centimeters of the computer, and changes a global boolean to reflect this change.
Meanwhile, the front-end sends get requests to the back-end via Axios.
The back-end, via Express.js, handles requests and returns the aforementioned boolean.
When the front-end receives the value true, a new page displays, starting the screening.
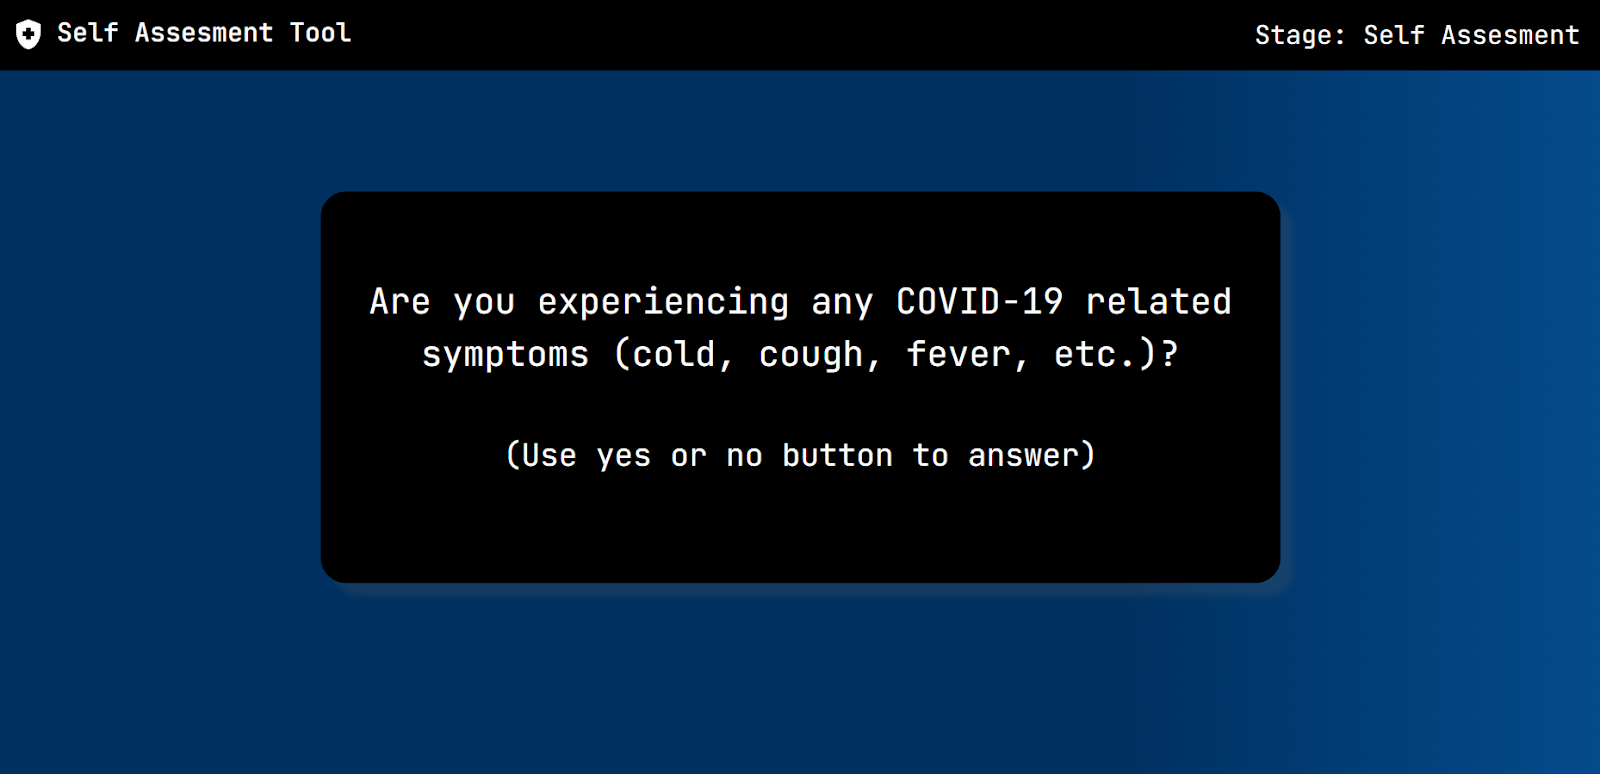
The first thing a user must do is answer a series of questions regarding potential symptoms or close contact. However, instead of clicking a yes or no button on the screen, the user must instead press physical buttons. Similarly to the HC-SR04 sonar, each button had an event listener attached, which on a click sets one of two booleans to true for 100ms. Another get request pulls the two boolean values. If "no" is selected as an answer, the screening process would abruptly end. If "yes" is selected, the next question is displayed. After all questions have been displayed and "yes" has been answered for all, the front-end navigates to the next part of the process.
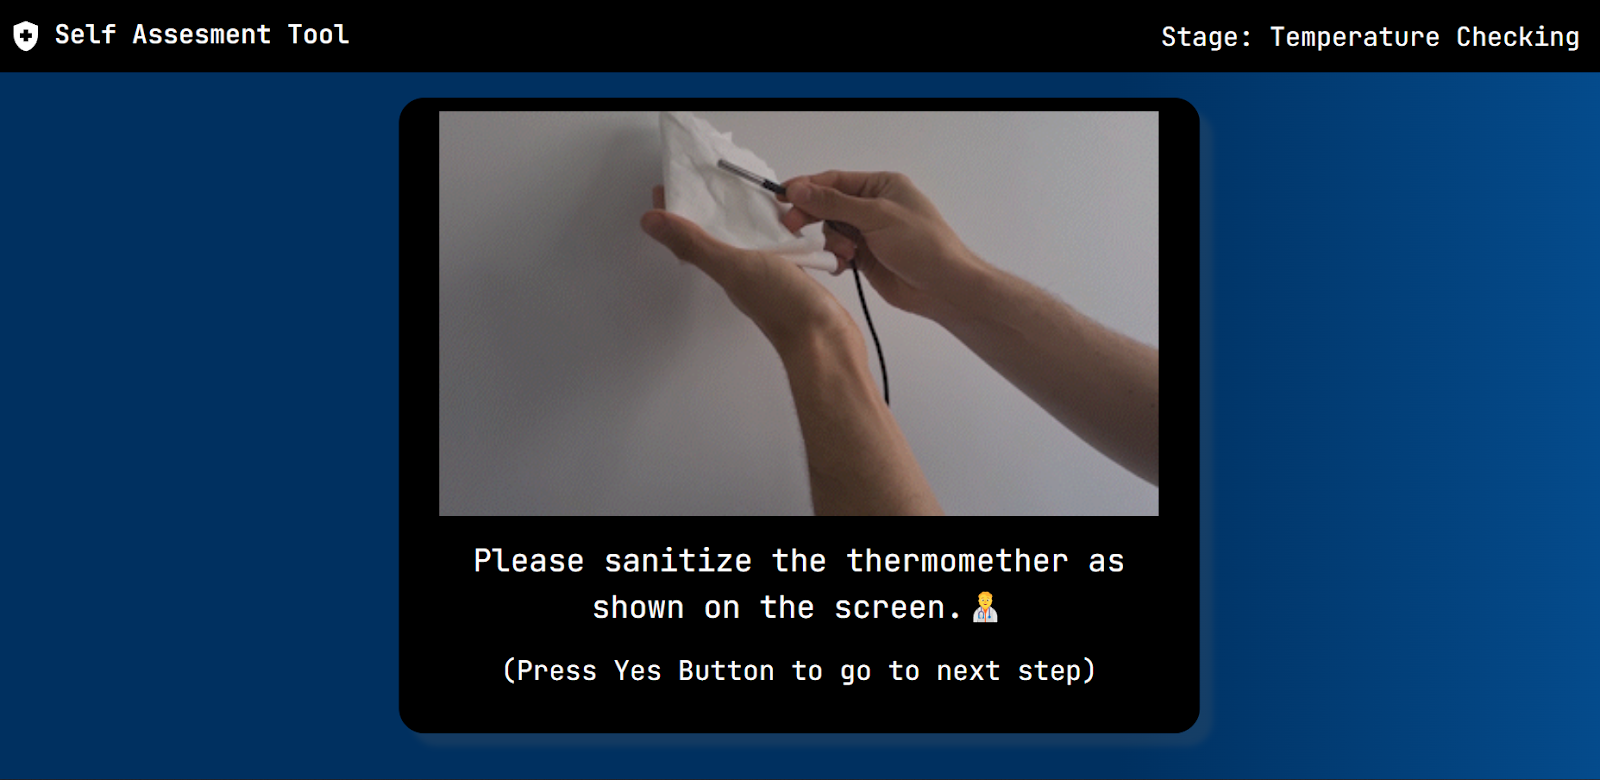
Next, the user must measure their temperature using a body temperature probe thermometer. The user is instructed to sanitize the thermometer, with a GIF displaying the example. After clicking a button to continue, the user is then told to play the thermometer on the underside of their elbow with a new GIF. Continuing, the user holds the thermometer in place for 30 seconds, and the temperature measurement takes place. In the same way as the previous two features, the value is recorded via an event-listener-called function and transfered via a get request. After 30 seconds, the result displays on the screen. If the temperature value is too high, the user is not permitted to continue. A timeout function triggers the navigation to the next page, which depends on the above result.
One of the last things a user must do is scan their vaccination card and government ID.
Due to user privacy, we didn't build a way of scanning actual IDs, but we substituted via custom QR codes.
npm's react-qr-reader component was used to read a QR code from the user's webcam, showing the webcam footage on the screen via the <QrReader> tag.
The QR codes are then read and the string result is sent via a callback function and then a post request to the back-end to parse.
Each set of identification scans had separate purposes and associated functions.
true, the front-end navigates to the next ID scan.
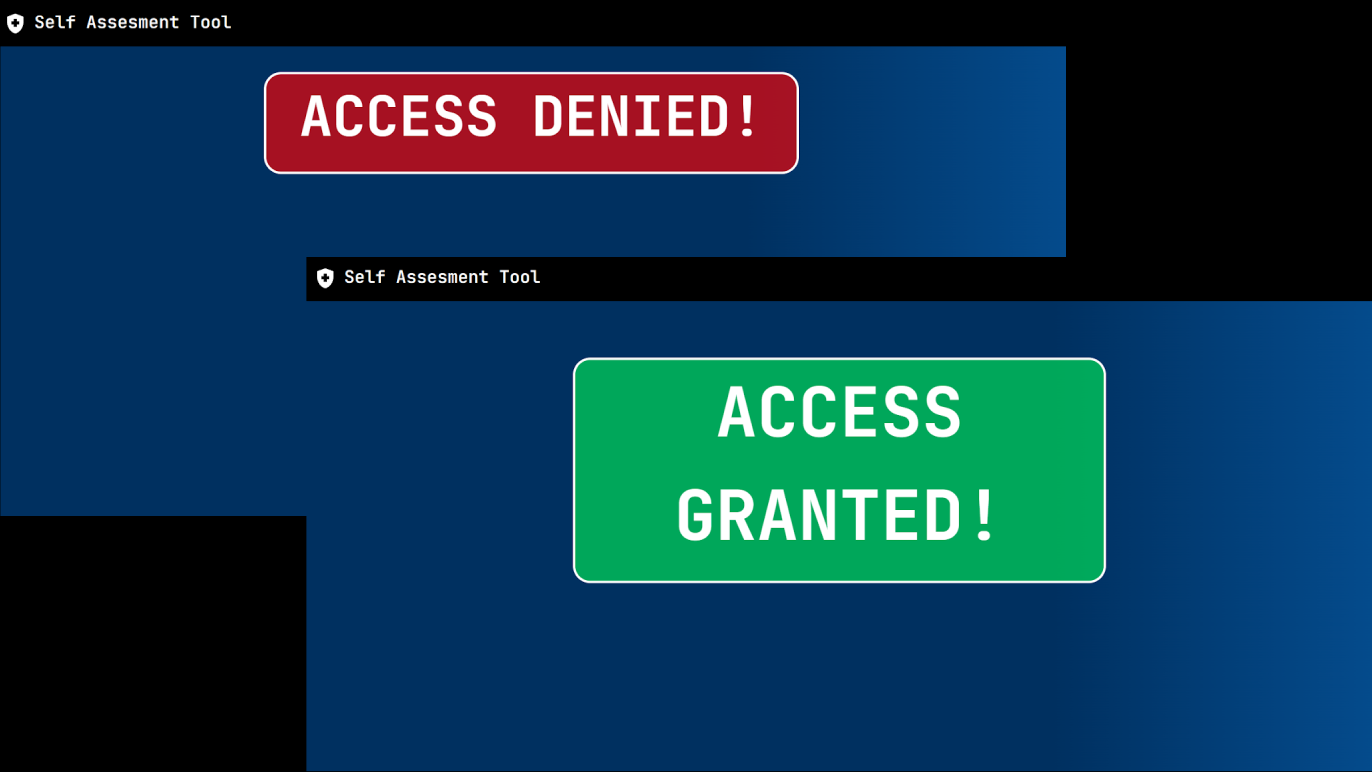
Otherwise, access is denied.
Throughout this process, there are several times when access can be denied: failed questionnaire, high temperature, invalid ID, or unvaccinated status via ID. In these cases, the front-end will navigate to the "Access Denied" screen, and after timeout back to the waiting page. However, if the user passes the screening, the front-end displays the "Access Granted" page. At the same time, a get request sends which triggers a servo motor to rotate, simulating the opening of a door as if the person can now enter whichever building employs this system. On a 5 second timeout, the front-end then signals the back-end to return the servo back to it's original location, closing the hypothetical door, and returning to the waiting page to start another cycle.
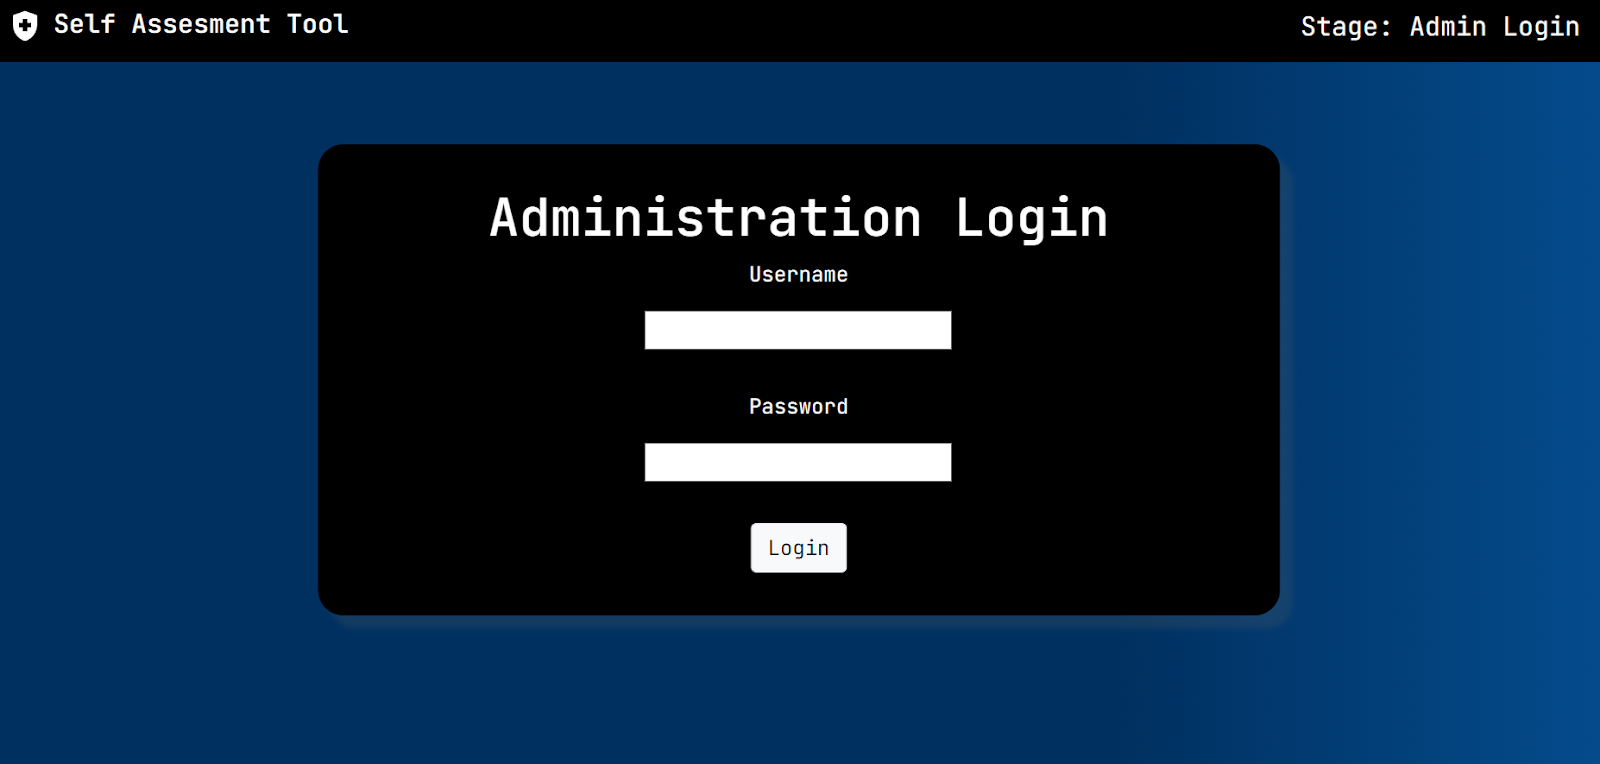
All previous entries have discussed how a regular user would interact with this project. The rest of these entries deal with how the administrative team (the four of us who worked on this project) can use the data collected. However, since not everyone is allowed access, a login system was used in order to access the administrative dashboard. This process was done using HTML forms, with inputs for username and password. When submitted a very quick post request checked if both username and password were valid. If they were valid, the admin would gain access to the dashboard, otherwise a message would appear under the form informing the inputter of the incorrect information.
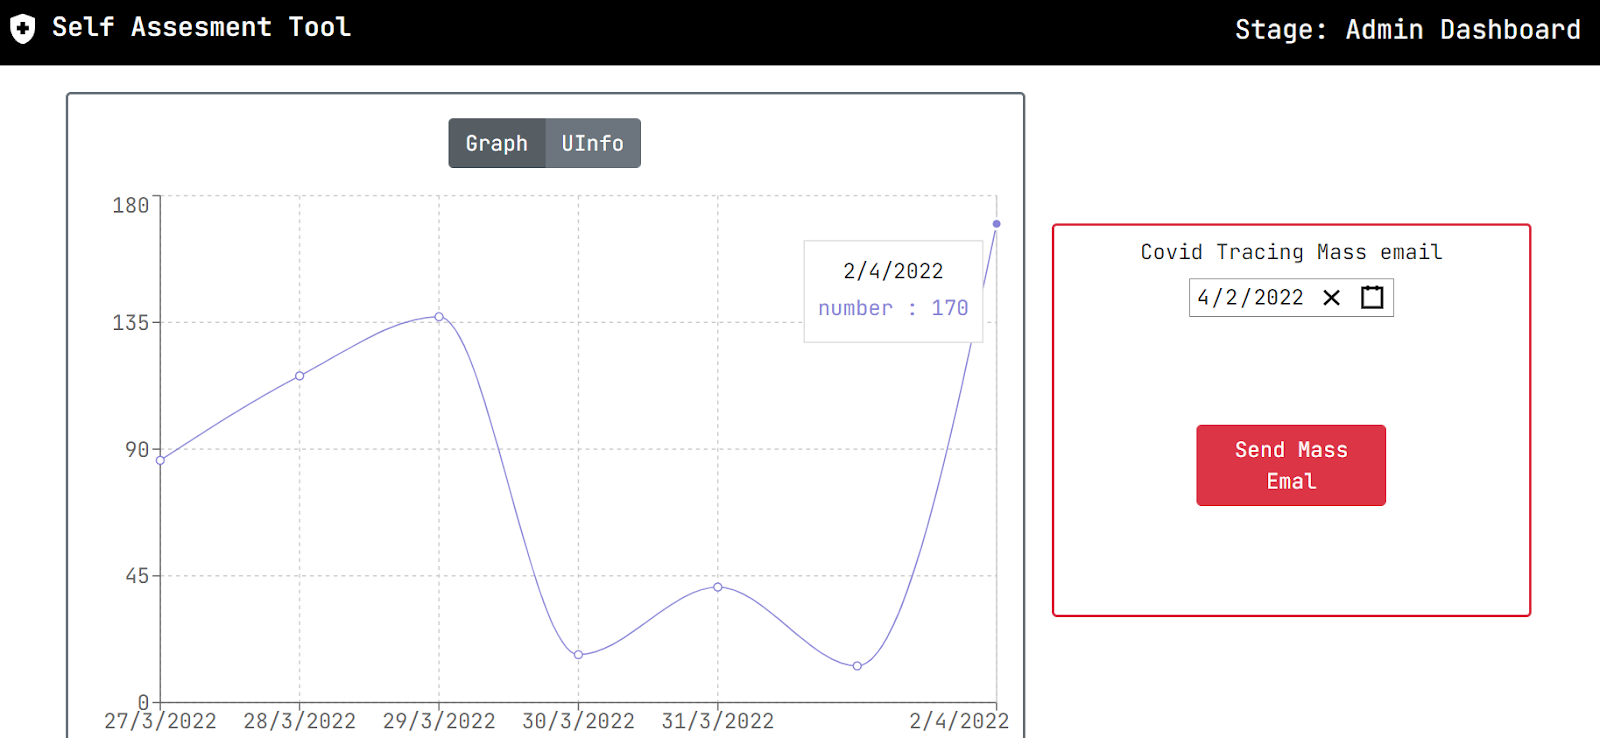
The admin dashboard can be split into two parts; this is the first part (on the left).
The graph is created using npm's recharts library, specifically component for a line graph.
The data for this graph is taken from the user information database mentioned in Feature 4.
As this database groups users based on the day they access the application, the back-end compiles the number of people who accessed the graph each day and sends the data to the front-end to be used by the graph.
Contained in a <ResponsiveContainer> element, when you hover over each dot on the graph, the <Tooltip> element displays a small box with the specific datum.
An administrator using this application may want to know which individual days or days of the week are busiest or most inactive.
The second part of the admin dashboard is the mass email feature (on the right).
This feature is extremely important to an administrator, as if there is a COVID breakout in the location in which this app is used, the admin can send an email to everyone who may be affected on the day contact with the virus occured.
When the "send mass email" button is clicked, a callback function sends a post request to the back-end.
The back-end first gathers an access list of individuals' emails from the date sent in the post request.
An object is then organized with to, from, subject, text, and HTML sections; the to: section contains the previously created list, and the HTML: section effectively the text: section with formatting HTML tags included in the string.
Finally, @sendgrid/mail is employed to send multiple messages to each of the emails included in the list.